It’s officially springtime, which means it’s time to start thinking about fun and festive nail ideas that will help you celebrate the season. Whether you’re looking for something subtle or eye-catching, these rainbow nails will add a pop of color to your look. Read on for inspiration!
Rainbow nails are the perfect way to add a pop of color to your look this spring. Whether you’re looking for a fun and festive manicure for a special occasion or want to brighten up your everyday style, these rainbow nail ideas will inspire you.
Rainbow nails to brighten up your day
Everyone has a rainbow nail look, from bold and bright designs to more subtle and subdued hues. So whether you’re a minimalist at heart or love going all out with your nails, we’ve got you covered.
Ready to get inspired? Here are some of our favorite rainbow nail looks for spring…
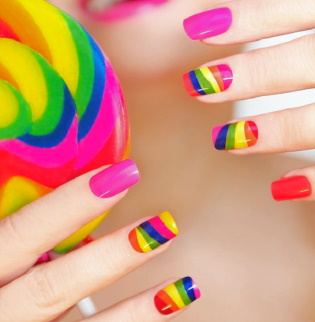 Bold and bright rainbow nails
- Rainbow glitter nails
- Ombre rainbow nails
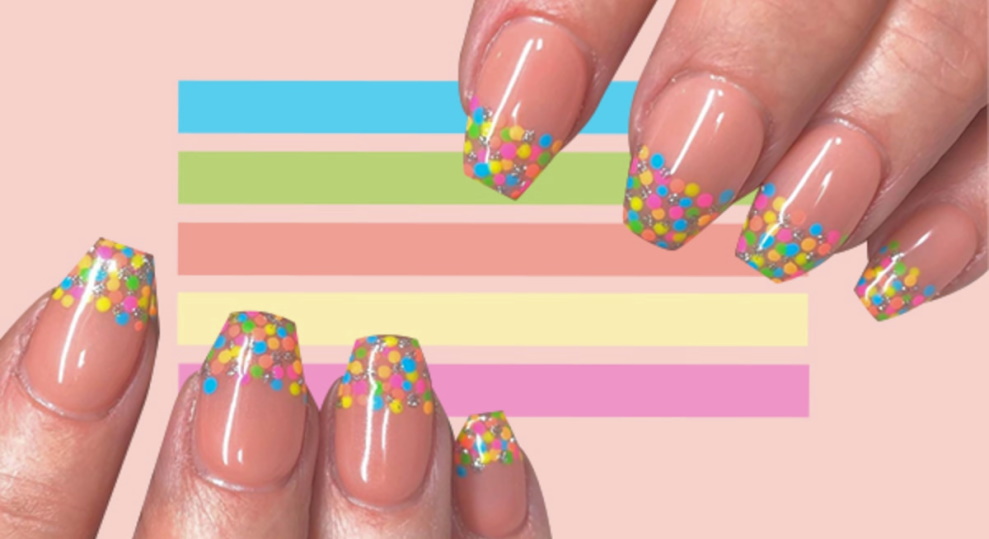
- Pastel rainbow nails
- Negative space rainbow nails
- Chevron rainbow nails
- Watercolor rainbow nails
- Galaxy rainbow nails
- Floral rainbow nails
- Tie-dye rainbow nails
How to get a perfectly polished rainbow nails?
Rainbow nails are all the rage these days, and it’s easy to see why! They’re fun, colorful, and just plain pretty. But if you’ve ever tried to paint your rainbow nails at home, they can be tricky to get right. The key is in the order of the colors. If you start with the wrong color or apply the colors in the wrong order, your rainbow will look more like a hot mess than a work of art.
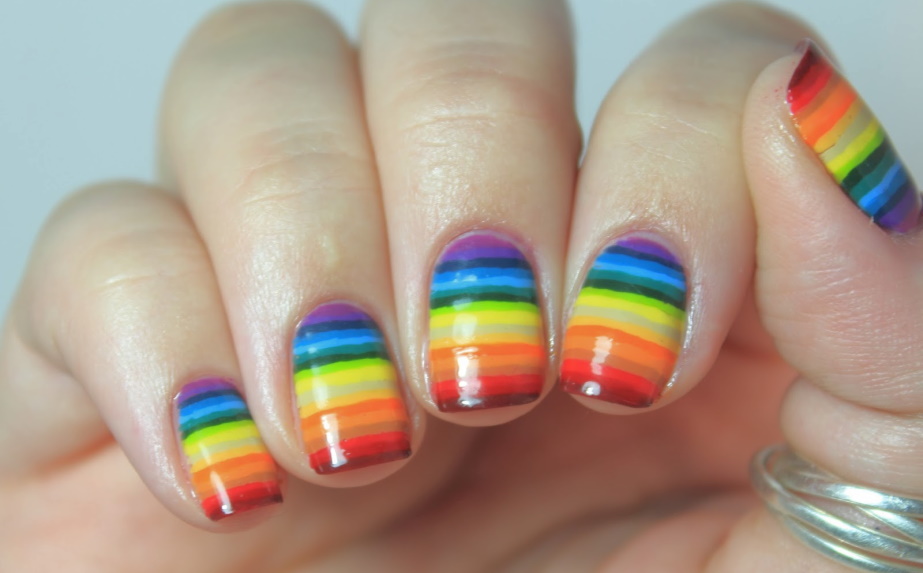
- First, you need to gather your supplies. You will need a clear base coat, white polish, a sponge, and seven different polish colors in whatever shades you prefer.
- Next, start with a clean slate by painting your nails with a clear base coat.
- Once the base coat is dry, apply a layer of white polish. This will help the colors pop and make them appear brighter.
- Now it’s time to start sponging on the colors! Begin with one color and lightly dab it onto the sponge. Then transfer the color onto your nail, working in layers until you are satisfied with the opacity.
- Repeat this process with each remaining color until all seven colors are on your nails.
- Finally, seal your work with a clear top coat and enjoy your fabulous rainbow nails!
Recommended To You